Assembly Guide: Bringing Your Floating Friend To Life
- Daniela Klaz
- Sep 6, 2023
- 3 min read
Updated: Sep 4, 2025
I'm so excited to have Quackpackers venturing out into the world! I wanted to be sure to explain how they are "assembled" once you receive your package.
Most importantly - please use scissors - not a giant blazing butcher knife - to gently open your box. There's no need to perform surgery on your new friend before your friend hatches from the box.
For the Voyager and Island Hopper Duck/Flamingo:
First, ensure the one-way valve is fully inserted into the deflation valve, and both are inserted into the base.
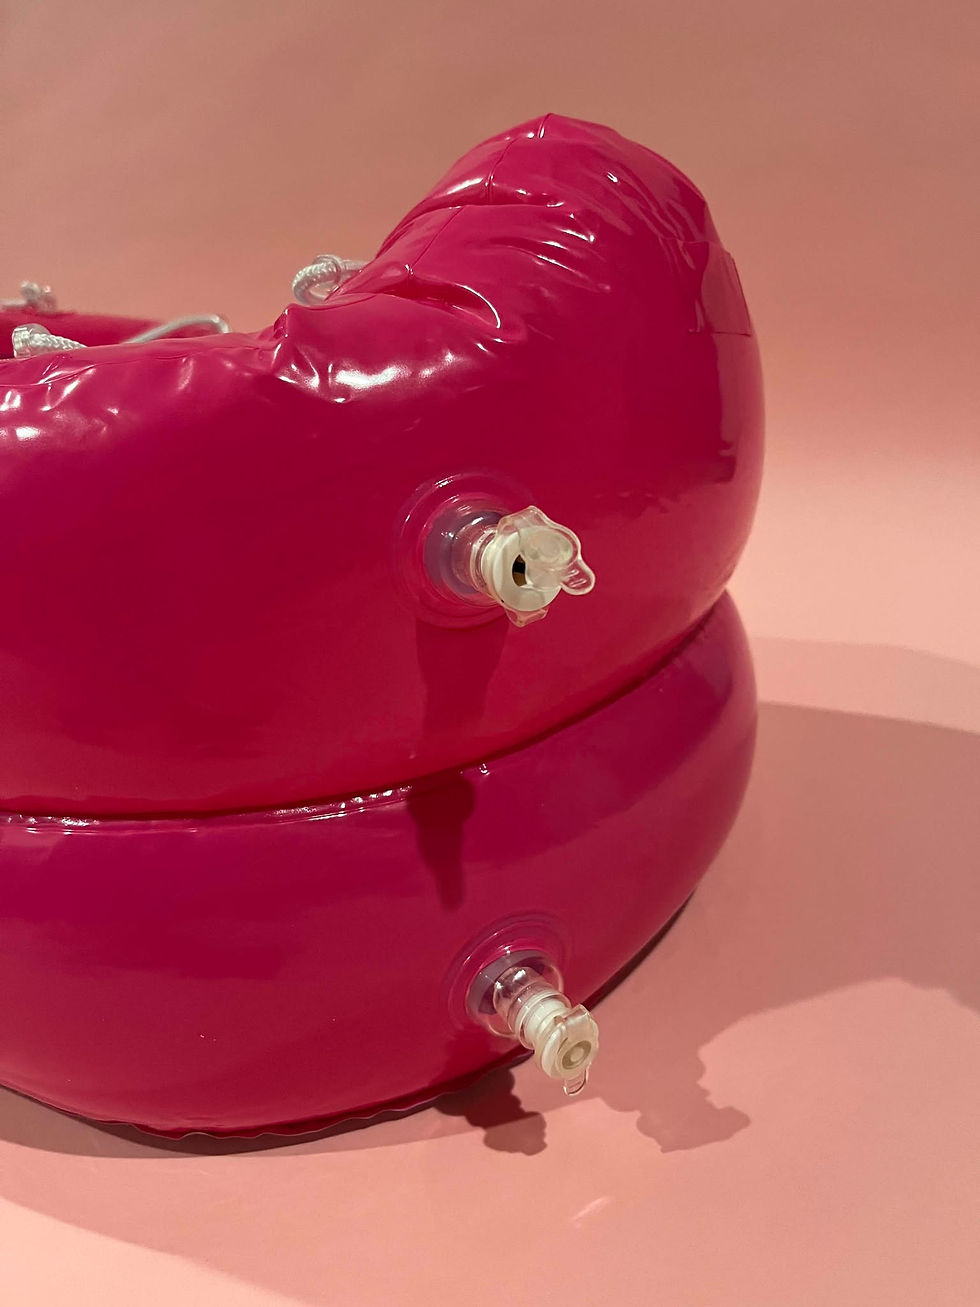
The white ring indicates the one-way inflation valve. If you pull the white ring out of the base, there is no other valve to prevent the air from escaping your buddy, and you'll have to plug the white valve in and start over.
NOTICE: The valves were not intended to be inserted back into the inflatable. They are intended to be "outies" and sit as pictured above and below, even after complete inflation.

Then, grab the long piece of rope that came in your packet, or an alternative length of rope of your choice, and begin threading it through the eyelets around the top edge of the storage compartment. Some folks prefer only a portion of the eyelets to be used, so you choose your own adventure. You can cross-thread how you feel works for you. If you opt to use less length of the cord, you can shorten the rope by cutting and melting the new end(s) of the rope so it doesn't fray.


Here's an example of a shortened rope that creates a small carrying handle on the butt of the Island Hopper Duck.


When you've decided that there's enough rope in your desired web (or lack thereof), you can just tie off your cords, either by tying them together, or creating knots along the eyelets.

Using any of the eyelets is totally optional! Don't trip, potato chip! If you don't want to use the rear eyelets, you don't have to!

Here's an example of cording that allows for things like smaller drybags or shoes to be more secure or have more space to clip to.

To attach the tether, use the smaller length of rope that came with your duck/flamingo to create a necklace. It's incredibly important that you don't just tie a knot around the neck of the inflatable, as that could lead to cutting the material through garroting or manual strangulation! Use those two eyelets, one on each side of the neck, to make it comfortable for your buddy to support you without getting strangled.

Using a double knot is recommended to ensure the knot is robust and can't slip through the eyelet when wet.

If you purchased a model with added lateral stabilizer rings, you can get creative with your attachment method, looping the rope through the top and/or bottom rings depending on how frisky the water will be for your swim. We recommend using all 4 rings for extreme chop and waves.

Now, you're ready to attach the tether and belt! Use a clip to attach the tether to the neck cord. This allows the float to shift as needed with wind and waves, making it a smoother trip for your buddy.

If you purchased a model with lateral stabilizer rings, you can clip to either the top, bottom, or through both rope attachment areas! Feel free to try different neck attachment methods to find what works best for you.

After your swim, if you want to deflate your Quackpacker, pull the black insert out to the final valve stem. Roll the Quackpacker up (instead of folding it) for storage

Night Lights
Optional: if you're swimming in a low-visibility area or at night, be sure to add some lights to the back of the head and rear end of your buddy. These plastic clip areas are designed to hold glow sticks and other lights! (Lights are not included in purchase)


For the Quackpacker Mini:
1) Inflate your friend through the regular inflation valves. There are 2 chambers; be sure to inflate both chambers fully. You may need to use your teeth to loosen the valve and allow quicker air entry into the chamber.

2) Add your storage compartment ropes if desired. You can use a shoelace X pattern and either tie the ends together or double knot each end to prevent it from sliding through the eyelet.

3) Add the neck tether connection point, either through the top, bottom, or all 4 loops on the front of the mini:


Comments